This guide will show you all of the extra features you can do with the Beacons after provisioning.
Step-by-step guide
Once you have setup Beacons you can start managing them.
- Click on the Beacons tab on the left hand side of the portal.
- You can change the view by click the buttons on the right side of the window.
- You will be able to see General information about each beacon.
Square View:
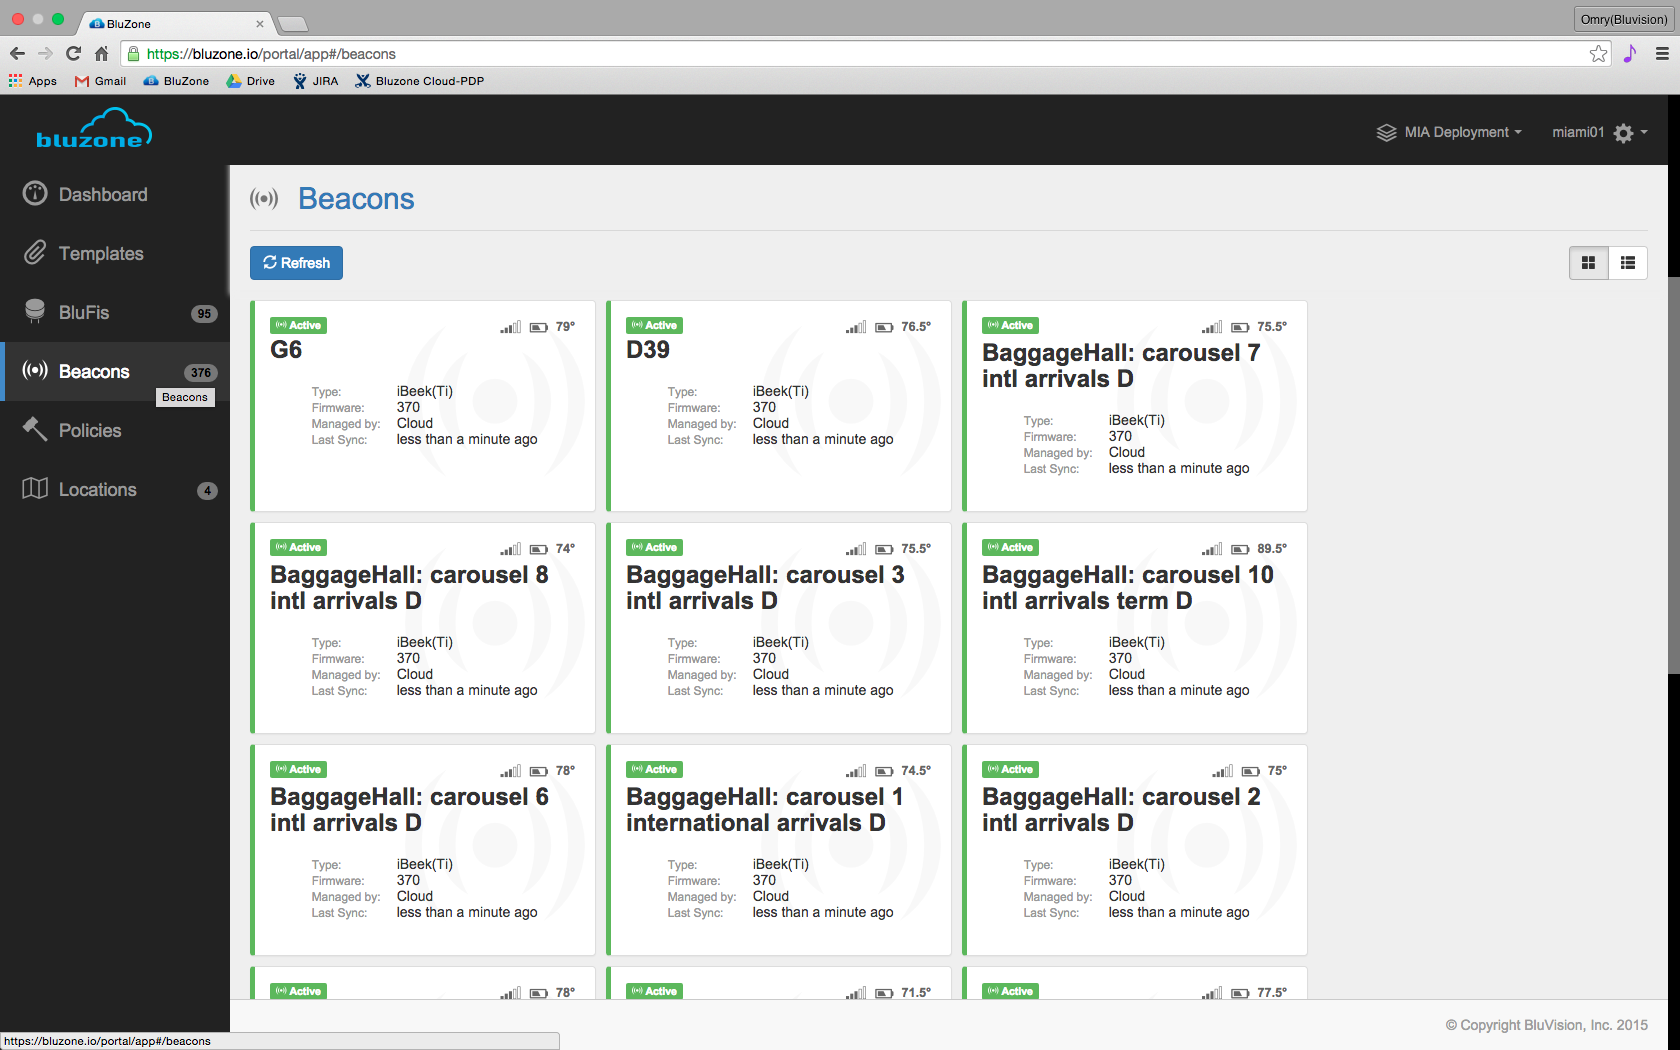
In this view you can see general information about the Beacons such as:
- Name
- Status
- Temperature
- Type
- Firmware
- Manager
- Last Sync
Table View:
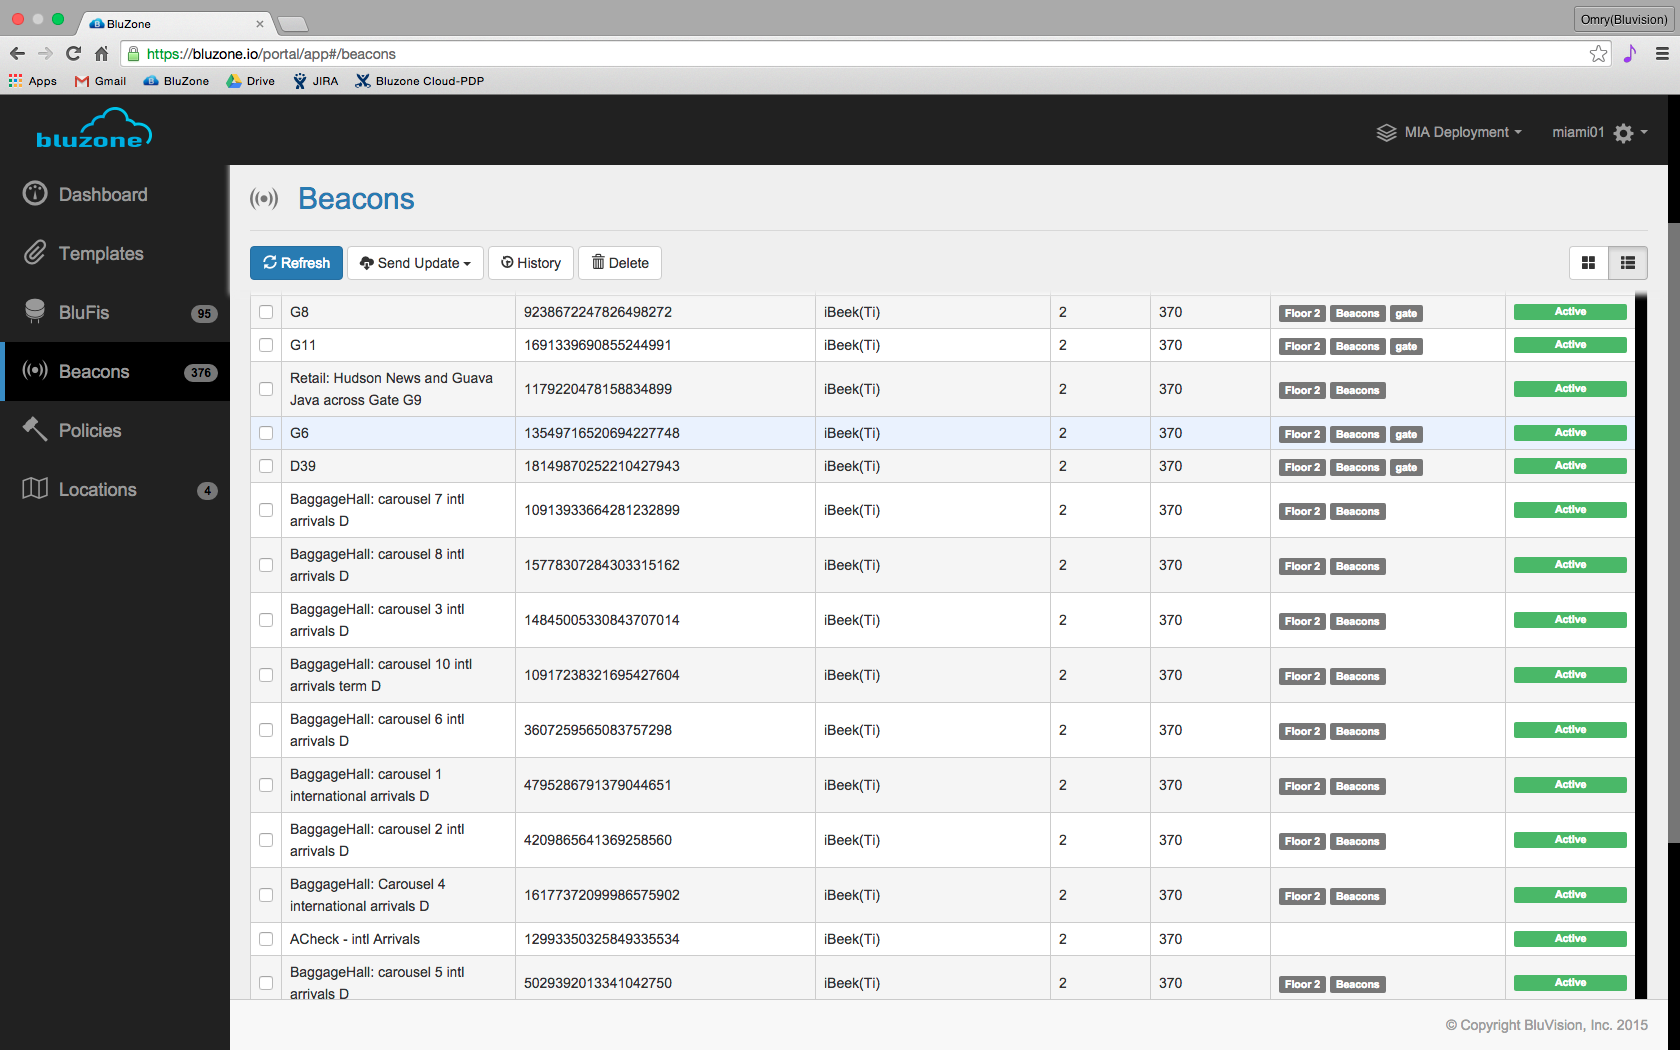
In table view, you will have more options to tweak your Beacons.
In this view you can see general information about the Beacons such as:
- Name
- SID-64
- Type
- level
- Firmware
- Tags
- Status
From the main view you will be able to do these actions:
- Filter Beacons
- Choose the column you would like to filter by.
- Press the three lines on the top of the specific column
- Choose the method you would like to filter by.
- Fill in the required fields
- Click Filter
**To clear, press the lines again and click clear
- Send Updates
There are three types of Updates you can send
First, tick the boxes of the Beacon you would like to send updates to.- General
- Click Send Update
- Choose General
- Fill in the desired fields
- Click "Update X Beacon(s)"
- Configuration
- Click Send Update
- Choose Configuration
- Fill in the desired fields
- Click "Update X Beacon(s)"
- Metadata
- Click Send Update
- Choose Metadata
- Fill in the desired string
- Click "Update X Beacon(s)"
- General
- Export History
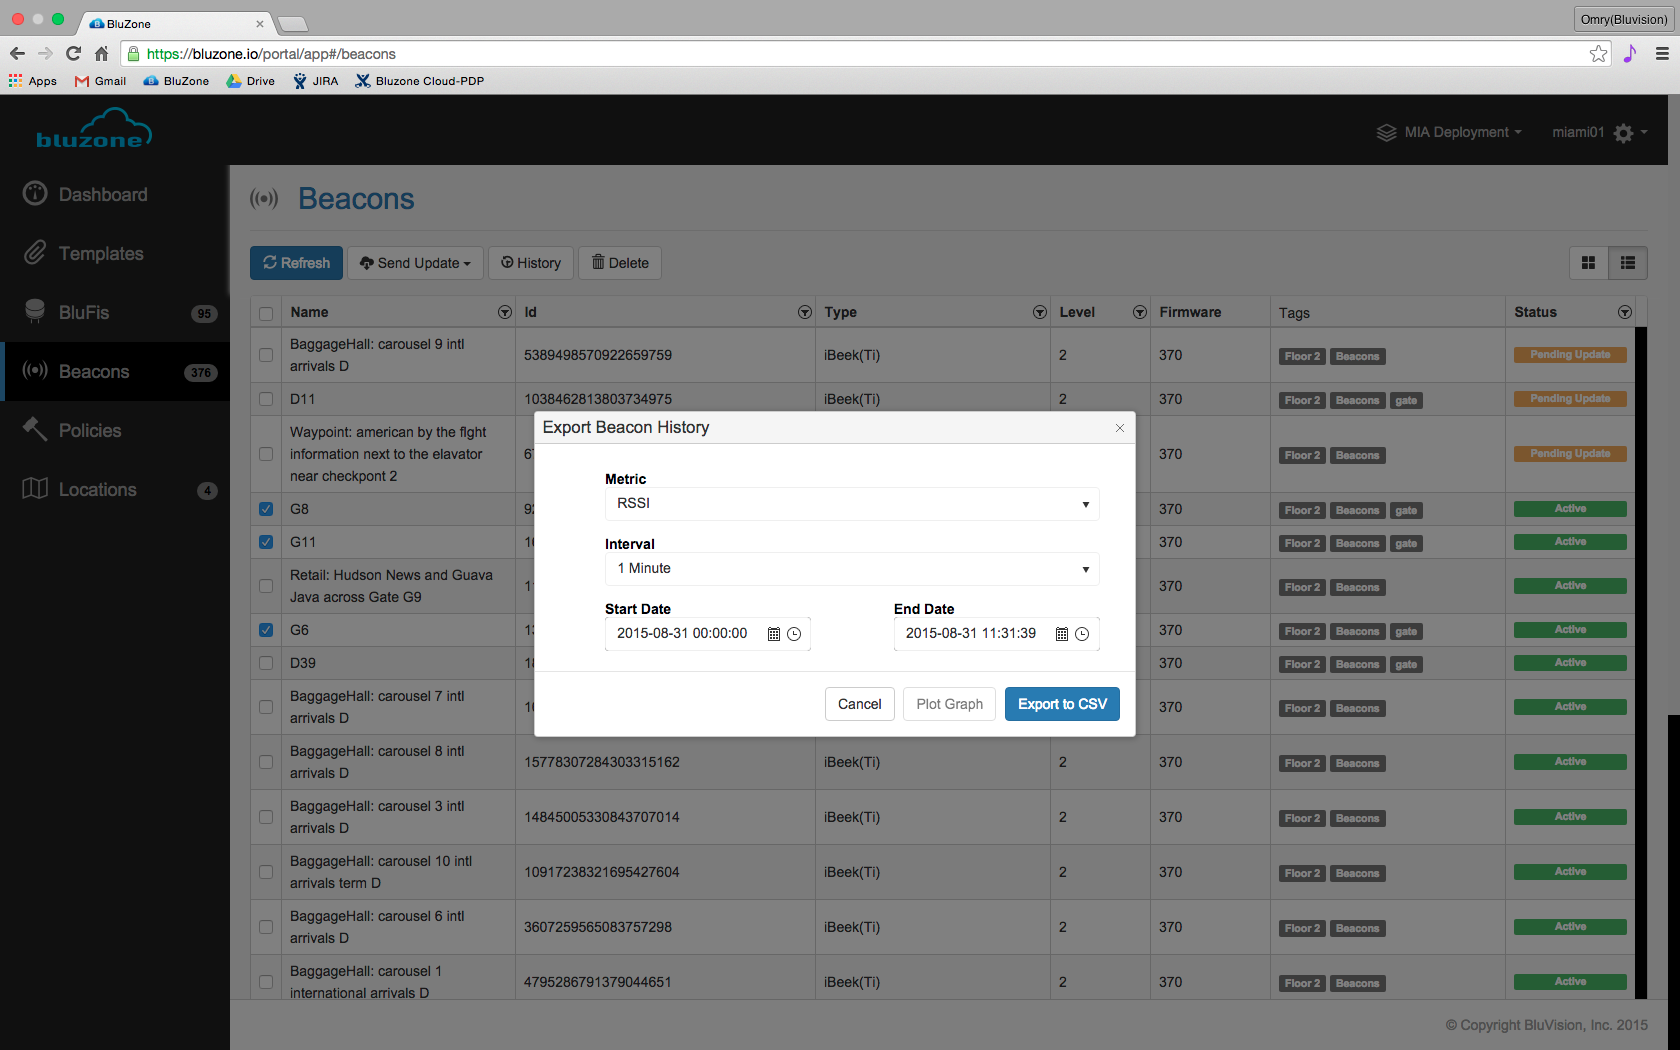
- Exporting History can be done in two ways,
- Single Beacon Export
- From any list, click a Beacon.
- Click the history button located under the Beacon name.
- Chose the type of history you would like to export
- Chose the time interval
**Bigger intervals will make averages of smaller ones - Pick the start and end time and date
- Click Export to CSV
- Multiple Beacon Export
- From Table view tick all Beacons you would like to export history
- Click History button
- Chose the type of history you would like to export
- Chose the time interval
Bigger intervals will make averages of smaller ones - Pick the start and end time and date
- Click Export to CSV
- Single Beacon Export
- Delete Beacons
- Single Beacon Delete
- From any list, click a Beacon
- Click delete button located under the Beacon name.
- Confirm delete
- Multiple Beacon Delete
- From Table view tick all the Beacons you would like to delete
- click delete
- Confirm delete
- Single Beacon Delete
Single Beacon Management.
From any view, click the beacon you would like to view/edit.
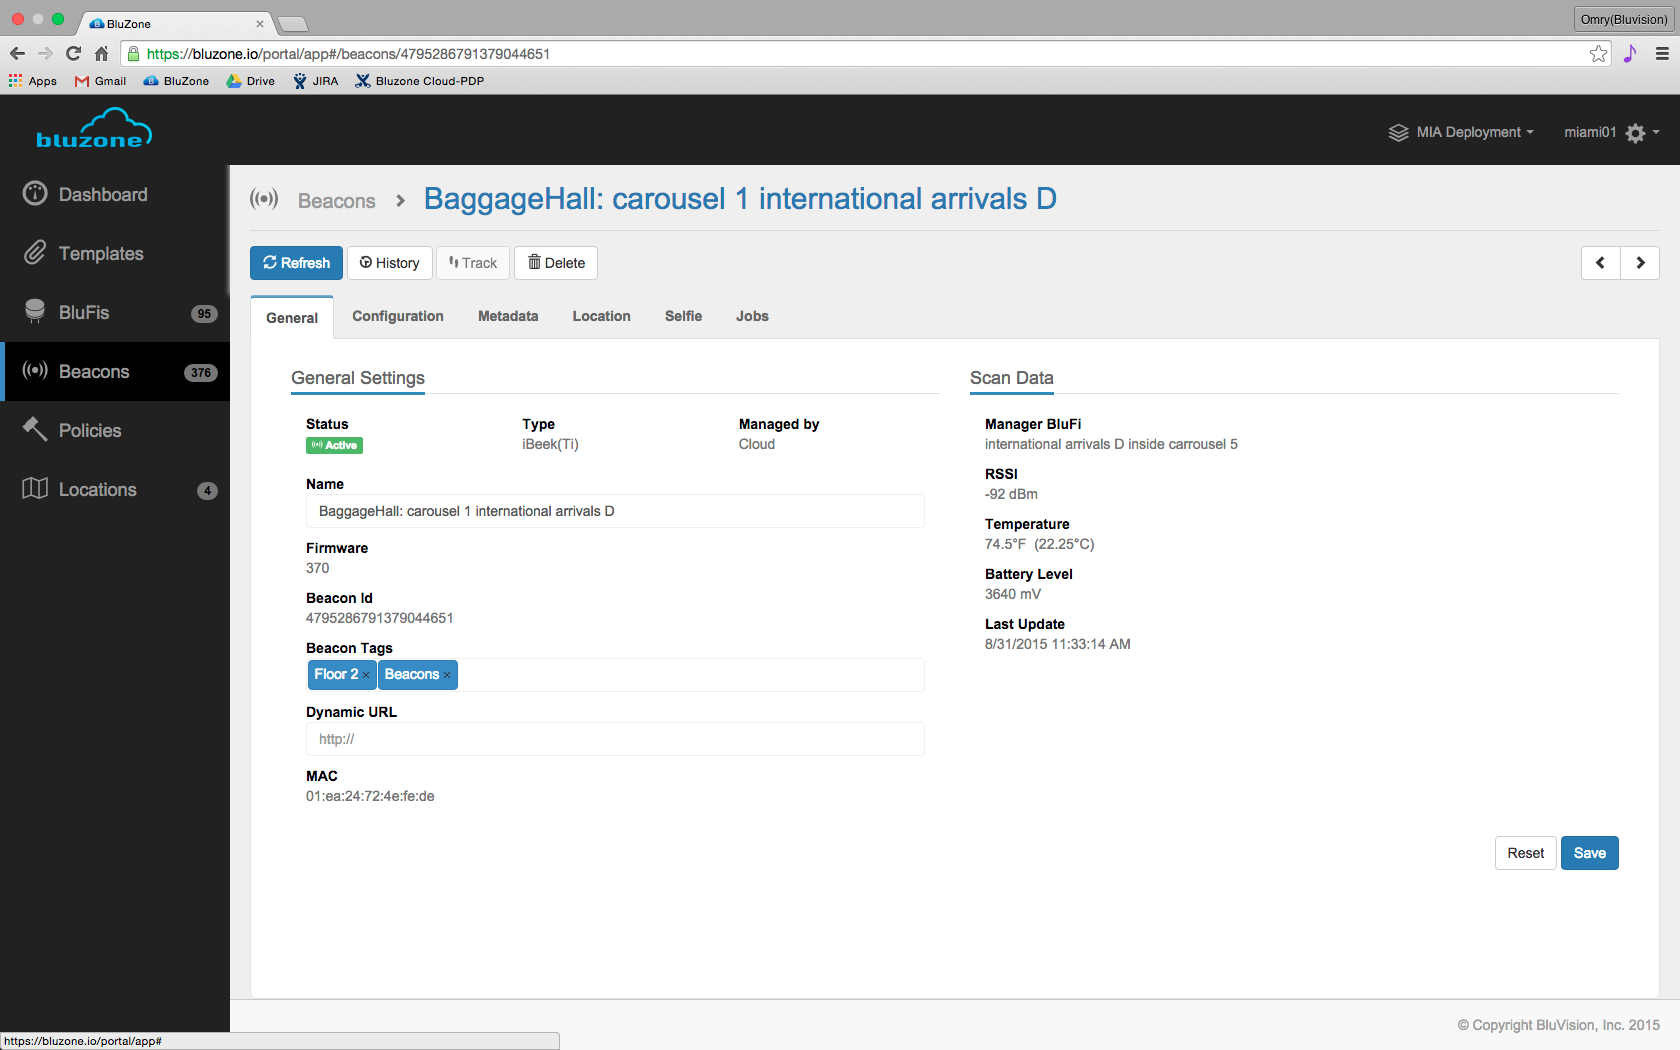
- General Tab
In this tab you can:- Change name
- Manage Tags
- Manage Dynamic URL
- See Various information such as
- Managing BluFi
- RSSI
- Temperature
- Battery Level
- Last Sync
- SID-64
- Beacon Manager
- Firmware Revision
- Type
- MAC address
- Configuration Tab

In this tab you can- Lock Beacon to be cloud managed only
**Can only be updated through a BluFi - Change iBeacon Settings
- Enable or Disable Sensors
- Lock Beacon to be cloud managed only
- Metadata Tab
- Insert JSON formatted metadata to be used for extra information on the Beacon that isn't regularly supported by Bluzone.
- i.e Terminal, Aisle, Height, Color, Type of Beacon, Other forms of identification.
- Location Tab
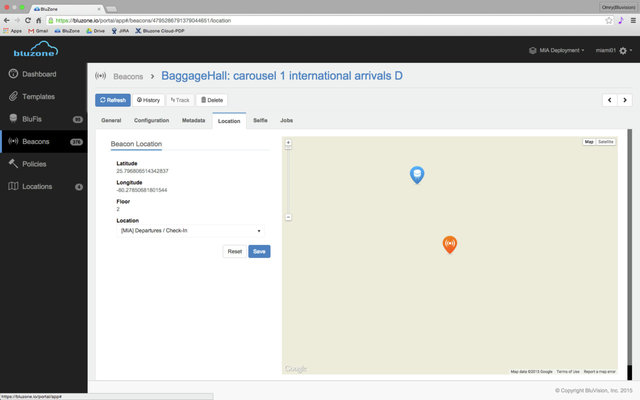
- Change location of the Beacon
- Change Place on map of the Beacon
- Selfie
- See the Photo that was uploaded while provisioning.
- Jobs
- History of jobs that were done on the Beacon.
- Delete a beacon
- Click the delete button under the Beacon name.
- Confirm delete
- Track Beacon (Future Release)
Related articles